
Let There be Light (Emitting Diode)
- Dror Margalit
- Sep 14, 2022
- 2 min read
Working electric current is magical: a few wires connected to an energy source and voilà - something happens. Whether this "something" is turning an LED on, measuring distance, moving a motor, or anything else, breaking down electrical technology into its most basic form - electric current - reveals the great potential of technological tools.
Let There be Light (Emitting Diode)
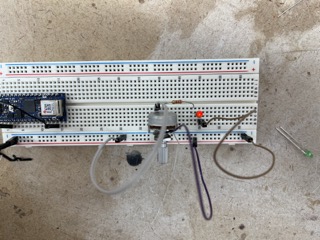
Since I have some (basic) experience with Arduino, I didn't think that turning an LED on would be challenging at all. Yet, when I tried to connect it for the first time, I could not see any light because the resistor I used was too strong.

The resistor in the image has a relatively high resistance value. When I built the switch, however, I tried a less-resisting resistor which caused the LED to be brighter without burning out.


Once I figured out the correct resistor, connecting the rest of the components was fairly easier.
Potentiometer
The potentiometer worked well on my first try (this time). In the past, I tried to work with a potentiometer with an additional resistor and burned an LED when dialing down the resistance.

Switches
In this example, each switch turns the LED on.


Here, I needed to press all the switches together to turn the LED on:
My switch - if a light switch exists and no one can see it...
I built my switch because all light switches have an inherent problem: you can not find them when you need them the most - when it is dark. Consequently, I wanted to find a way to light the switch when it is not used.


In the pictures, we can see that the LED on the switch is always connected to the ground, and the positive only connects when the switch is up (closing the circuit). On the bottom part of the switch, to positive wires are connected, closing the circuit of the LED on the breadboard.


Comments